


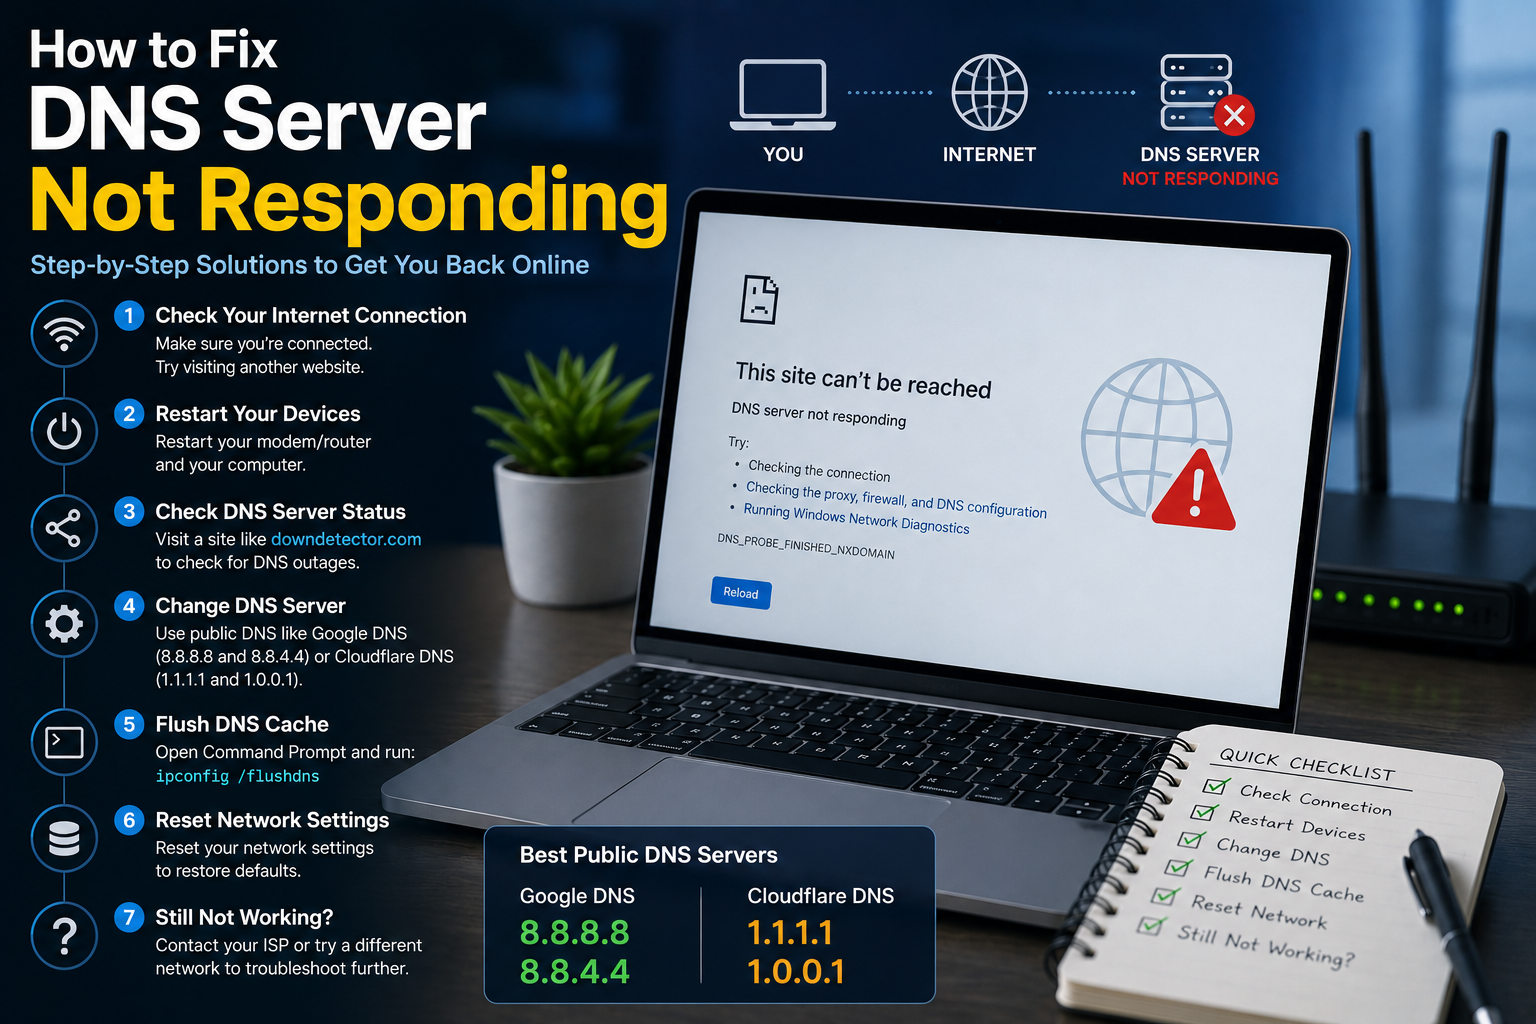
A “DNS server not responding” error means your device can’t reach the system that translates website names (like google.com) into the numerical IP addresses your browser actually needs to load them. Your internet connection itself might be working perfectly fine — DNS is a separate step in the process, and this error means that specific step is failing.
Step 1: Confirm It’s Actually a DNS Issue
Before troubleshooting, rule out a broader connectivity problem:
- Open your browser and type a direct IP address into the address bar, such as
8.8.8.8 - If a page loads: your internet connection is fine, but DNS isn’t resolving — continue with the steps below
- If nothing loads at all: the problem is likely your internet connection itself, not DNS specifically
It also helps to check a second device (phone, tablet, another computer) on the same network:
- If the second device works fine: the issue is isolated to your original device
- If both devices have the same problem: the issue is likely your router, ISP, or DNS server itself
Step 2: Restart Your Router and Modem
This resolves the majority of DNS errors and should always be tried first.
- Unplug your router and modem from power
- Wait 30-60 seconds
- Plug them back in and wait for the connection to fully re-establish
Step 3: Restart Your Device
A simple restart clears out temporary network glitches and stuck processes that can interfere with DNS resolution.
Step 4: Flush Your DNS Cache
Outdated or corrupted cached DNS data is a very common cause of this error.
Windows:
- Open Command Prompt as Administrator
- Run:
ipconfig /flushdns
Mac:
- Open Terminal
- Run:
sudo dscacheutil -flushcache
Step 5: Switch to a Public DNS Server
If your ISP’s DNS server is slow, overloaded, or temporarily down, switching to a public DNS service often resolves the issue immediately and can improve everyday browsing speed too.
Windows:
- Settings > Network & Internet > Status > Change adapter options
- Right-click your active connection (Wi-Fi or Ethernet) > Properties
- Select Internet Protocol Version 4 (TCP/IPv4) > Properties
- Choose Use the following DNS server addresses and enter a public DNS, such as
8.8.8.8and8.8.4.4(Google), or1.1.1.1and1.0.0.1(Cloudflare)
Mac:
- System Settings > Network > select your connection > Details
- Go to the DNS tab and add the same addresses
For step-by-step setup instructions across every device type, Cloudflare’s official 1.1.1.1 setup guide covers Windows, Mac, mobile, and router-level configuration.
Step 6: Check for VPN Interference
If you’re using a VPN, it may be routing DNS requests incorrectly or through a DNS server that’s currently unreachable.
- Temporarily disconnect from your VPN and see if the error resolves
- If it does, check your VPN app’s settings for DNS-related options, or consider a split-tunneling feature if your VPN supports it
Step 7: Check Your Firewall Settings
Firewall or antivirus software can sometimes block DNS queries outright.
Windows:
- Control Panel > Windows Defender Firewall > Allow an app or feature through Windows Defender Firewall
- Find DNS Client and make sure it’s checked for both private and public networks
If you have third-party antivirus software with its own firewall, temporarily disable it to test whether it’s the cause.
Step 8: Disable IPv6 (If Using Older Hardware)
The transition to IPv6 can occasionally cause compatibility issues with DNS resolution on older routers or network adapters.
- Control Panel > Network and Sharing Center > click your active connection > Properties
- Uncheck Internet Protocol Version 6 (TCP/IPv6)
- Test your connection again
Step 9: Update Your Network Adapter Driver
An outdated network driver can cause intermittent DNS failures alongside other connectivity quirks.
- Right-click Start > Device Manager
- Expand Network adapters
- Right-click your active adapter > Update driver
Step 10: Reset Network Settings Entirely
If nothing above has worked, a full network reset clears out any lingering misconfiguration.
Windows:
- Settings > Network & Internet > Advanced network settings > Network reset
Mac:
- Remove and re-add your Wi-Fi network under System Settings > Network > Wi-Fi > Advanced
This will remove saved networks and reset adapter settings to default, so you’ll need to reconnect to Wi-Fi afterward.
Step 11: Contact Your ISP
If the error persists across multiple devices and none of the above resolves it, the problem may be on your ISP’s end — their DNS servers could be experiencing an outage or misconfiguration outside of your control. Contact them directly to confirm.
DNS issues sometimes show up alongside broader system slowness. If your computer feels sluggish beyond just browsing, check our complete guide to fixing a slow computer to rule out other performance issues.
