")
Keeping your phone updated is key to unlocking better performance, improved security, and new features. If you’re using a Samsung Galaxy J7 V or Galaxy J7 (2nd Generation), this guide will show you exactly how to check for and apply the latest software update.
Why You Should Keep Your Galaxy J7 Updated
Software updates help your device by:
- Improving overall performance
- Patching security vulnerabilities
- Fixing bugs and glitches
- Introducing new features and enhancements
How to Update Your Samsung Galaxy J7: Step-by-Step
Here’s a guide to help you locate and apply the most recent software update on your Galaxy J7:
1. Launch the Settings App
Swipe up from the home screen to access your apps, then tap on Settings.
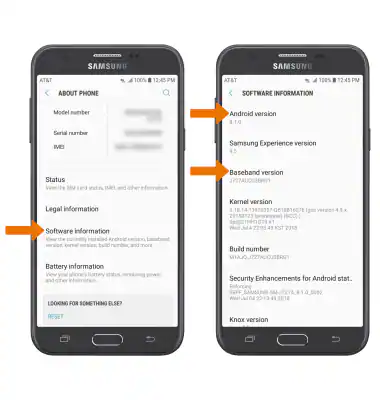
2. Find the Update Option
Scroll through the settings and tap on System or Software Updates—this is where all update-related actions happen.
3. Search for Available Updates
Tap Check for new system updates to let your phone scan for the latest version.
4. What to Expect
- No update available? You’ll get a message confirming your device is already up to date. Tap OK to exit.
- Update found? A prompt will appear allowing you to begin the download.
5. Download the Update
Select Download to start pulling the latest software onto your device. Ensure you have a solid Wi-Fi connection.
6. Install the Update
Once the download finishes, tap Install Now. Your phone may restart as part of the installation process.
7. Complete the Update
After your phone powers back on, follow any remaining on-screen steps to finish up.
Pro Tips for a Smooth Update
- Roaming disables updates, so be on a local network.
- Plug in your phone or make sure it’s charged to at least 50% before starting.
- Use Wi-Fi to avoid mobile data charges.
Conclusion: Keep Your Galaxy J7 Running Smoothly
Installing the latest software update on your Samsung Galaxy J7 helps you stay protected, improve device speed, and access enhanced features. The process is quick and easy—just a few taps, and you’re up to date.